
The tail light bulb has an important lighting function. With it, you and other drivers can work safely on the site. Especially in bad weather or at night, tail lights can make your machine visible to other field production workers and other operators. If one or both of your tail light bulbs are damaged and not working, replace the bulbs as soon as possible. Replacing the tail light bulb is an easy maintenance and you can do it yourself. So, how to replace tail light bulbs? This guide will guide you through the step-by-step replacement of the tail lights.
Tail Light Functions and Features
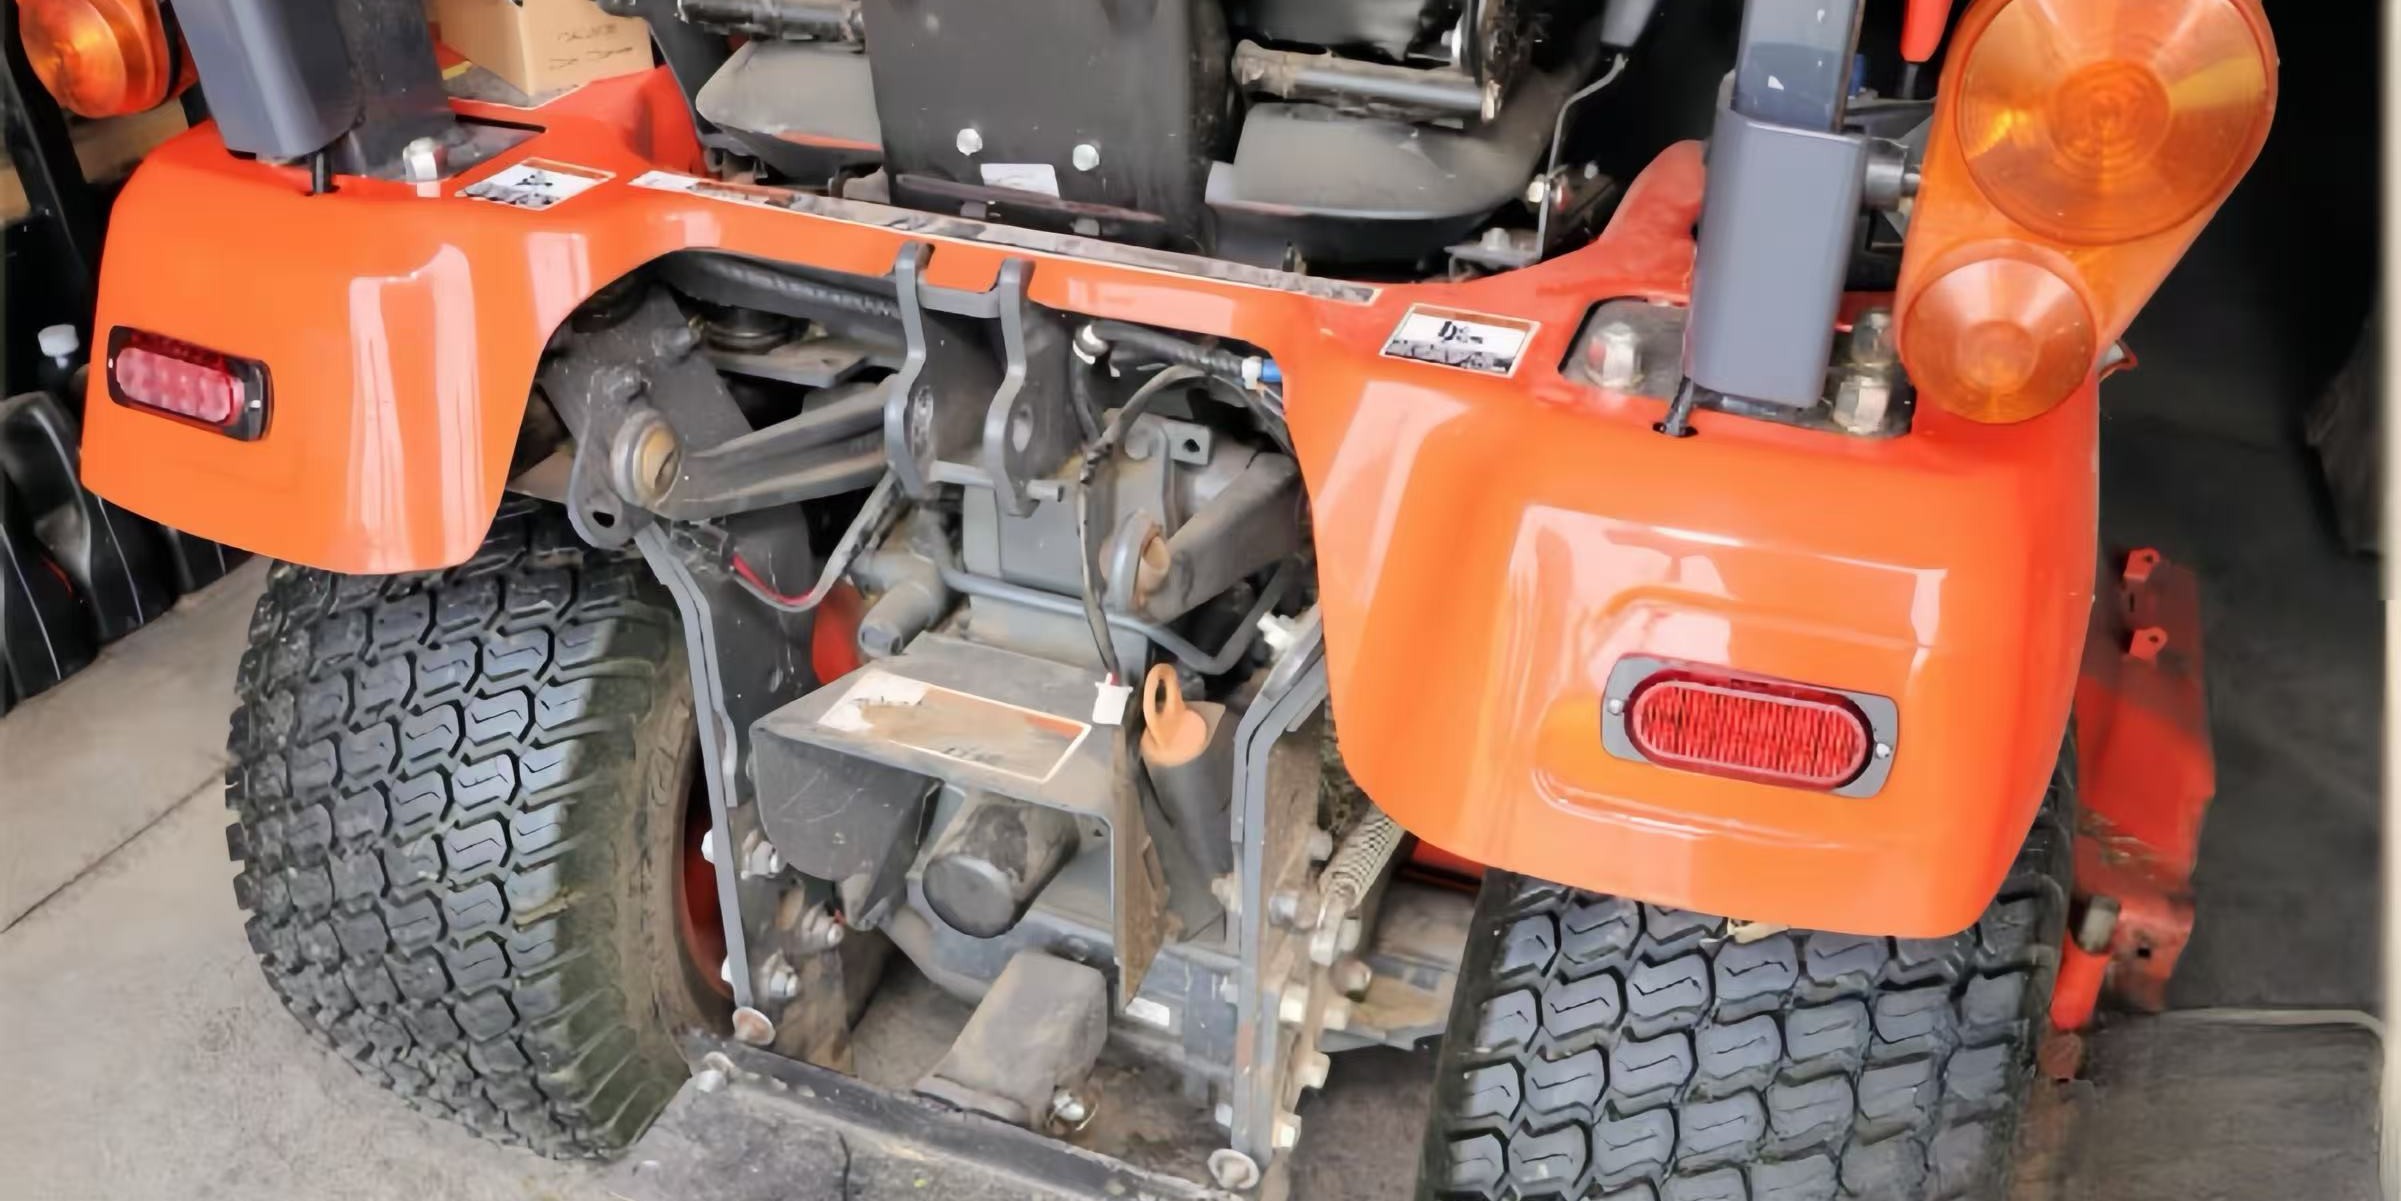
Before you do a tail light change, figure out why they matter. Unlike “family cars”, the tail lights on construction machinery must be dirt-resistant, shock-resistant, and able to withstand wind and rain. The main function is very simple: let others see you, especially when it is not yet dawn, almost dark, or when it rains or turns gray, so you can avoid being hit on the construction site.
The tail light is not just as simple as lighting up a light. It is also a communication tool. When you step on the brake and the light comes on, the person behind knows you’re slowing down; when you turn on the signal, others know you’re about to turn—giving them more time to react and keeping everyone safer. Now many the off-road and engineering equipment has been replaced from old-fashioned halogen lamps to sealed LED lamps. Old machines may also be able to replace light bulbs, but most new machines treat the entire light set as a whole, which is well sealed, waterproof, dustproof and shock-resistant. That is, the so-called “light bulb change” thing is now often about changing the entire set of tail light assemblies instead of just one small light bulb.
Tools and Materials Needed
Having the right tools on hand before you start will make the job much smoother and safer. The environment your equipment operates in means fasteners are often rusted and caked in mud. Preparing for this will save you a lot of frustration.
Essential Tools and Personal Protective Equipment (PPE):
Get all the tools you need ready before you start. The equipment on the construction site is exposed to wind and sun all year round, and screws, rust, and mud are commonplace. Preparing in advance can save a lot of trouble.
- Safety Glasses and Work Gloves: Crumbs, sharp edges, or hot parts can hurt eyes and hands.
- Socket Set and Wrenches: preferably a complete set of sleeves containing both metric and imperial dimensions. A deep socket is needed.
- Breaker Bar: Need extra leverage to loosen stubbornly rusty bolts.
- Penetrating Oil: an aid for removing rusty fasteners. Spray bolts and nuts before removing them.
- Wire Brush: It can remove dirt, mud and rust from the surface and hardware.
- Torque Wrench: Make sure the mounting bolts are tightened according to the manufacturer’s specifications. If not, it will loosen over time.
- The Correct Replacement Part: that’s crucial. Please check your machine model and part number carefully. You must get the correct replacement lamp assembly. For older machines, make sure you’re using the correct model and power halogen bulb.
If Splicing Wires is Necessary:
- Wire Strippers and Crimpers: For preparing wires and securing new connectors.
- Heat Gun: For activating the sealant in heat-shrink connectors.
- Weatherproof Butt Connectors: Use connectors with built-in heat-shrink tubing to create a durable, water-tight seal that resists corrosion.
How to Replace Tail Light Bulbs?
Repairing heavy equipment is different from repairing ordinary cars. It pays more attention to safety and durability. Next step by step, we will take you through the professional-level repair process, so that the repaired lamp is stronger and more secure. Don’t forget to read the service manual of your device before you do it. Different models may have special considerations.
Step 1: Implement Lockout/Tagout (LOTO) Safety Procedures
Before you start, make sure the machine is completely powered off and no one can start it unexpectedly while you’re working.
- Safe Parking: Park the machine flat, secure, and away from passing vehicles.
- Put down all the attachments: like buckets, shovels, these are to be put on the ground, and the equipment is to lie firmly on its stomach.
- Close & Fix: Tighten the handbrake, turn off the engine, pull out the key.
- Disconnect: Find the main power switch (usually a red or black knob), turn it to the “off” position. If not, disconnect the battery negative.
- Listing Tips: Hang a “no operation” or “under repair” sign on the steering wheel or ignition switch to let others know at a glance that the machine is being overhauled.
Step 2: Access and Clean the Assembly
The tail lights of the equipment are generally quite strong and there will be protective devices.
- Clean the work area: first clean the mud, oil and dust around the tail lights with wire brushes and rags, and wipe them together with the bolts. The dirt was removed, and it was much easier to disassemble and assemble later.
- Remove the protective cover: most equipment has an iron cage or guard net outside the tail lights, which are bolted to prevent being hit. Use a socket wrench to unscrew these bolts, remove and lower the shield, and don’t throw it away.
Step 3: Remove the Old Light Assembly
The bolts of the main housing can now be removed.
- Spray Penetrating Oil: If the bolt looks rusty, spray more penetrating oil, wait for about ten minutes, and let it loosen by itself.
- Unbolts: Unscrew slowly with a suitable sleeve. If it’s too tight and can’t be tightened, use a crowbar to help. The small pieces of screws and washers are placed on the box or cloth first, don’t drop them.
- Take the shell: pull the lamp shell back gently. Sometimes it gets stuck in the dirt or guide pins, don’t pull it hard; you can get it down with a shake, a shake.
Step 4: Disconnect the Wiring
With the housing free, you can access the electrical connection.
- For Plug-in Connectors: Most newer machines have big weatherproof plugs. There’s usually a tab you press or a collar you twist to unlock it. Press down, then pull the two ends apart. Don’t yank on the wires—only grab the plug.
- For Older, Hard-Wired Lights:o plug? No problem. Just cut the wires a few inches away from the old light so you’ve got enough left to reconnect the new one later.
- For Replaceable Bulbs (Older Machines): If you are only replacing a bulb, twist the bulb socket counter-clockwise out of the housing. Pull the old bulb straight out of the socket. When inserting the new bulb, wear gloves to prevent oils from your skin from getting on the glass, which can cause it to fail prematurely. Once the new bulb is in, re-insert the socket into the housing and twist it clockwise to lock it. You can then skip to Step 6.
Step 5: Prepare and Install the New Assembly
- Clean the installation surface: First, use a wire brush to clean the position where the lamp is to be installed. The surface is flat and free of mud and rust, so that the lamp can be installed firmly and not easily shaken loose.
- Connect to the new light line: If there is a plug, just plug the new light directly into the wiring harness of the machine and hear “click” or feel stuck. If you want to wire it yourself, peel off about half an inch of wire on each side, with the colors facing each other. Tighten the wire with a waterproof joint, then use a hot air gun to shrink the tube tightly, sealing the joint to keep out water and prevent rust.
- Install a new light: Align the mounting hole, insert the bolt back, and fix it by twisting it a few times by hand to facilitate testing later.
Testing and Final Adjustments
Before you finish the job, it’s critical to verify that everything is working correctly.
- Temporarily Restore Power: connect the negative electrode of the battery back, or turn the main power switch on.
- Perform a Function Check: key to “on” gear (without starting the engine). Find a colleague to help you stand behind the machine and watch it together:
- Turn on the headlamps and see if the tail lights are on or off.
- Press the brakes to make sure the lights are on.
- Turn on the left and right turn signal lights to see if both sides are flashing normally
- Check for Proper Fit: the lamp and the body should fit flatly, not crooked, and not leave gaps. If it is uneven, it is easy to get water and dust. If the installation looks crooked, loosen the bolt slightly, adjust the position, and tighten it back up.
- Isolate Power Again: After you confirm everything works fine, turn the key off and switch the main power to “off” to finish the installation.
Safety Tips and Considerations
Working on heavy equipment requires a constant focus on safety.
- Always Prioritize LOTO: Never skip the Lockout/Tagout procedure. It is the single most important step for preventing accidents during any maintenance task.
- Verify the Part: Before installation, double-check that the new tail light assembly’s part number and connector match what is required for your machine. Electrical parts are often non-returnable.
- Torque to Spec: Once you’ve tested the light, use a torque wrench to tighten the mounting bolts to the manufacturer’s specification. This is vital for preventing the assembly from vibrating loose in a high-vibration environment.
- Reinstall Protection: Don’t forget to bolt the protective steel guard back into place. It’s there for a reason and will save you from having to do this job again after a minor impact.
In Conclusion
Tail lights are equipment safety devices. Improve vehicle visibility and let others know your driving intentions as well. A good lighting system can prevent accidents. Whether it’s replacing an LED light, changing its appearance, or simply replacing a burned-out bulb, a good tail light is a must for safe travel. FridayParts offers work lights compatible with all brands and models. Browse now to make your equipment safe to work with.
Tail lights are essential safety devices for your equipment. They improve visibility and help others understand your driving intentions. A reliable lighting system can prevent accidents. Whether you’re replacing an LED light, changing its appearance, or simply learning how to replace tail light bulbs, having a good tail light is a must for safe operation. FridayParts offers work lights compatible with all brands and models — browse now to keep your equipment safe and ready for work.