

A worn or broken drive belt can bring your mowing to a sudden stop. Whether you’re noticing strange noises and uneven cuts, or the mower simply won’t move, the drive belt is often the culprit. This guide walks you through everything you need to know, from reading a Cub Cadet drive belt diagram to replacing the belt yourself with confidence.
What Is A Drive Belt?
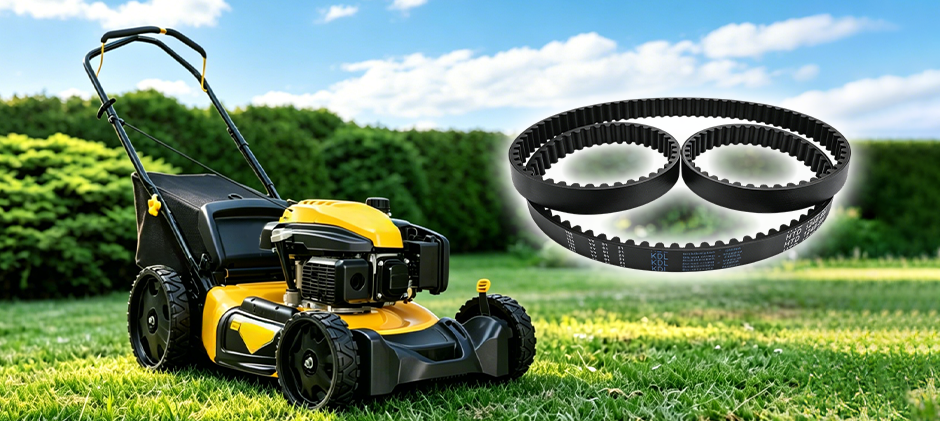
A mower drive belt is the component that makes your mower move. It connects the engine directly to the transmission, so people also call it a transmission belt. When you press the pedal or move the lever, the belt tightens and transfers power from the engine to the transmission, turning the wheels. It sits on the mower frame and stays in place even when the mower deck is removed. Built shorter, wider, and thicker than other belts, it’s designed to handle strong torque without stretching or slipping. Simply put, if the drive belt breaks, your mower won’t move. Click to see the difference between a drive belt and deck belt.
Types of Mower Drive Belts
- Deck Belt (Blade Drive Belt): This belt connects the engine’s crankshaft pulley (or a jackshaft) to the spindle pulleys on the cutting deck. When you engage the PTO (Power Take-Off) or blade engagement lever, this belt tightens and spins the blade spindles.
- Ground Drive Belt (Transmission Belt): On riding mowers and some self-propelled walk-behinds, a separate belt connects the engine to the transmission or transaxle, providing forward and reverse movement. Problems with this belt affect driving, not cutting.
- Self-Propelled Drive Belt (Walk-Behind Mowers): On self-propelled push mowers, a small belt connects the engine to the rear-wheel drive system. When this belt wears or slips, the self-propel function weakens or stops working entirely.
- Hydrostatic Drive Belt (Hydrostatic Riding Mowers): On mowers with hydrostatic transmissions, a belt drives the hydraulic pump. Wear here affects speed consistency and drive response.
Knowing which belt is causing your symptom tells you where to look and what to fix.
Components of the Drive Belt System
To understand the mower drive belt diagram, it’s essential to recognize the components in this system. The main drive belt components are as follows:
- Drive Belt: The main belt that connects the engine to the drive system.
- Idler Pulley: Helps maintain tension in the drive belt.
- Spindle Assembly: Connects to the mower blades and receives power from the drive belt.
- Transmission: Changes the speed and torque delivered to the wheels.
- Deck: The housing that contains the mower blades.
Where to Find Cub Cadet Drive Belt Diagram?
You can typically find the drive belt diagram from the following sources:
- Owner’s Manual: It is the most reliable source, usually included with the mower. If yours is missing, get it on the official website.
- Official Cub Cadet Website: Offers downloadable PDFs and parts diagrams.
- Authorized Dealers and Service Centers: Provide printed diagrams and expert advice
- Online Forums and DIY Communities: Users often share scanned diagrams and installation tips.
Always ensure the diagram corresponds to your model and production year of your Cub Cadet, as belt routing can vary slightly across
Cub Cadet Drive Belt Diagram for Your Reference
Here is a basic Cub Cadet drive belt diagram for you. Since the routing may vary depending on different models, always consult your owner’s manual for confirmation before any performance.
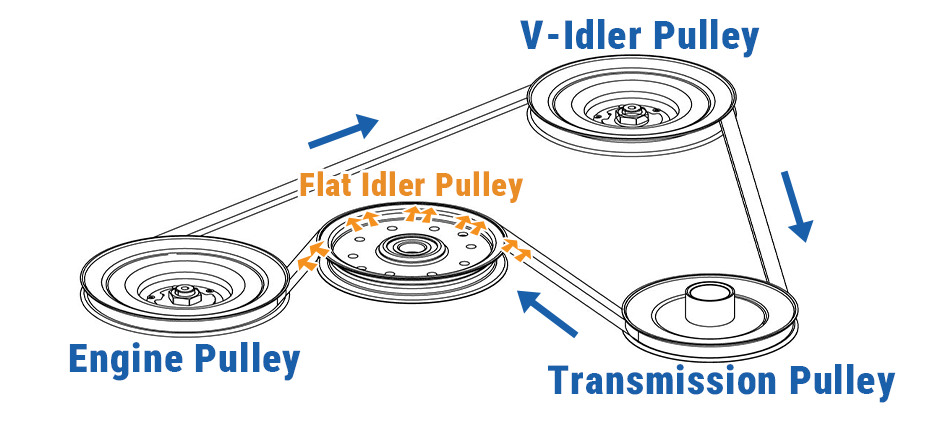
When the engine starts, the Engine pulley spins and drives the belt in a continuous loop. The belt travels up to the V-Idler Pulley, which redirects it downward to the transmission pulley. The transmission then converts that power into wheel movement. The flat idler pulley sits on the inner side of the belt, pressing against it to prevent slipping or sagging throughout the entire operation.
11 Signs You Need A Drive Belt Replacement
Waiting until the belt breaks to replace it can inconveniently delay your mowing. Here are common signs of a bad mower drive belt:
1. Squealing or screeching noise when the blades are engaged
2. Blades engage sluggishly or take longer to reach full speed
3. Blades slow down when mowing thick grass
4. Visible cracks, fraying, or missing chunks on the belt surface
5. Belt comes off the pulleys
6. Burning rubber smell during or after mowing
7. Self-propelled drive is weak, inconsistent, or stops working
8. Uneven cutting or scalping in patches
9. Visible black rubber dust on the deck
10. Belt appears shiny, hard, or stiff
11. Riding mower drives erratically, jerks, or won’t maintain speed
How to Replace the Drive Belt on a Cub Cadet Walk-behind Mower?
When you notice these bad drive belt symptoms, it is essential to replace the drive belt on your mower. Depending on your model, the instructions listed below may vary slightly. Always be sure to check your operator’s manual for detailed instructions. Here are general steps for drive belt replacement on your Cub Cadet walk-behind mowers. Wanna replace the mower deck belt?
Prepare the mower for maintenance
- Remove the spark plug and ignition wire
- Drain the fuel tank using a siphon, or put plastic under the cap to stop leaks
- Store the fuel in a portable fuel container (PFC) that meets government guidelines
- Tip the mower on its side with the air filter up
- Remove the self-tapping screws from the side of the deck
Remove the lawn mower blade and access the drive belt
- Wearing gloves for protection, secure the blade using the Universal Blade Removal Tool
- Carefully remove the blade retaining bolt and then remove the blade
- Remove the self-tapping screws that secure the engine baffle and mower drive belt cover to the deck
- Remove the baffle and belt cover
Remove and replace the mower drive belt
- Remove the drive belt from the blade adapter and drive pulley, then remove the blade adapter from the crankshaft
- Starting from the rear of the mower, carefully remove the mower drive belt from the transmission pulley
- Push down on the deck baffle to reach the engine pulley
- Slide the drive belt off this pulley and out from under the deck
- Replace with a new lawn mower drive belt. Thread it between the deck and the baffle. First, route it around the transmission pulley and then around the engine pulley.
Next, fasten the self-tapping screws that secure the deck baffle to the deck.
Put the mower back together
- Replace the engine baffle and secure it with the self-tapping screws
- Wearing gloves, secure the blade using the Universal Blade Removal Tool
- Replace the blade retaining bolt and blade adapter
- Tip the mower back onto its wheels
- Reconnect the spark plug ignition wire, and refill the fuel tank
Check your mower belt regularly for any signs of a failing belt and remember to follow your operator’s manual when performing any mower maintenance. It’s also a good idea to keep a mower drive belt on hand in case of an unexpected break. Shop quality aftermarket Cub Cadet drive belts at an affordable price from FridayParts. Our selection ensures perfect fitment and optimal performance of your Cub Cadet mower.
Wrapping up
Keeping your drive belt in good condition is one of the simplest ways to extend the life of your Cub Cadet mower. Watch for early signs of a failing belt and replace it with quality mower drive belts from reliable suppliers. When it’s time to replace it, make sure you’re using the right belt for your model. Ready to replace your drive belt?
