

When an EGR valve fails on off-highway diesel equipment, the cost is often less about the part and more about the downtime and misdiagnosis around it. This guide is written for fleet managers, shop owners, maintenance leads, and technicians who need a practical framework for deciding when cleaning is enough and when EGR valve replacement is the right call on late-model off-highway equipment. Layouts differ by engine family and chassis, but the checks and decision points below apply to most electronically controlled diesel EGR systems.
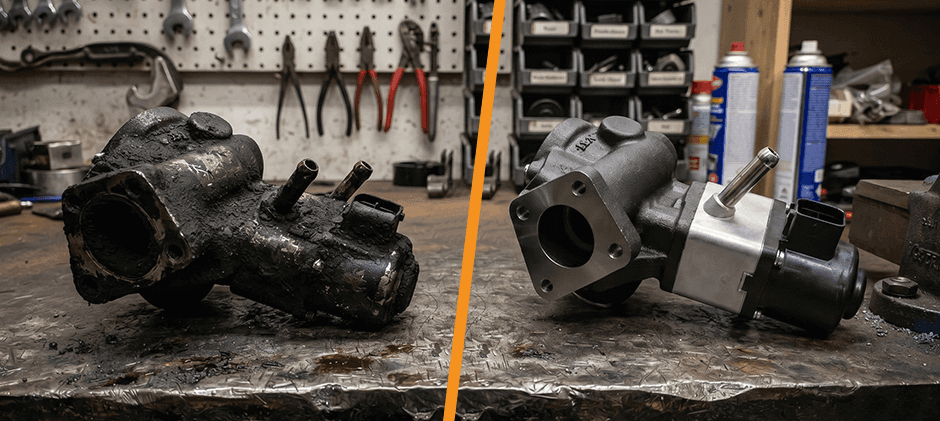
What Is an EGR Valve?
The Exhaust Gas Recirculation (EGR) valve routes a measured amount of exhaust gas back into the intake manifold to lower combustion temperature and cut NOx output. On Tier 4 and Stage IV/V engines, it is a control component the ECM uses constantly — which is also why it becomes a common failure point once soot, oil vapor, and heat start doing their work. Hardware layouts vary widely by engine platform.
Symptoms of a Bad EGR Valve
Once carbon builds up or the actuator starts to fail, the machine may begin to show symptoms the operator will notice. But most of these symptoms overlap with other systems, so treat them as directions to investigate, not conclusions.
Common signs include:
- Rough idle or stalling — often related to a valve not tracking its commanded position, though fuel and air-side issues can look the same
- Power loss under heavy load — weak hydraulic response when digging, lifting, or pulling
- Black smoke from the stack — an air-fuel imbalance that may or may not originate at the EGR
- Warning lamp on the monitor — an active fault code has set
- Higher fuel burn — may show up when EGR flow is off, but should be evaluated alongside load profile, regen history, and intake condition
- Derate or reduced-power mode — the ECM is limiting output to protect the engine
- Repeat regen problems — can be related to EGR faults, especially on machines with long idle hours, but should not be treated as proof by themselves; evaluate the DPF system as a whole before ordering parts
Quick reference — a starting point, not a diagnosis:
| Symptom | Possible Direction | First Thing to Confirm |
|---|---|---|
| Rough idle | Valve not tracking commanded position | Actual vs commanded position under active test |
| Weak hydraulic response | Restricted EGR passage or turbo-side issue | Boost pressure, intake carbon, turbo function |
| Black smoke | Airflow imbalance | MAF/MAP sensors, boost, and intake restriction |
| Coolant loss + white vapor | Possible EGR cooler leak — not the only cause | Pressure-test the cooler and rule out a head gasket or a cracked head |
| Repeat EGR fault codes | Sensor, wiring, cooler, or valve fault | Freeze-frame data, harness continuity, and cooler condition |
Coolant loss on its own does not confirm an EGR cooler leak. Head gasket failure, cracked heads, and intake-side coolant intrusion can look similar from the operator’s seat. Pressure-test the cooler and rule out internal engine causes before ordering anything.
EGR Valve Location — Where to Find It?
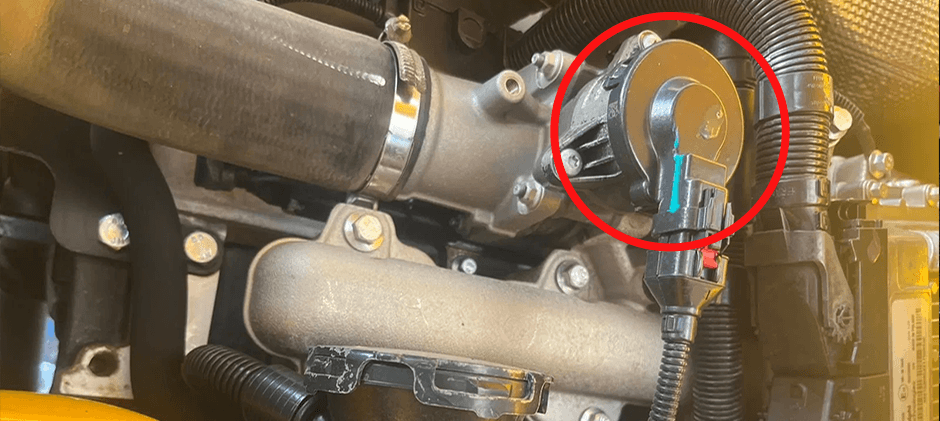
Access varies widely from one engine to the next. Engine packaging matters more than machine category — some platforms let you get to the valve in under an hour, others require pulling heat shields, coolers, or the intake manifold first. The categories below are a rough orientation only.
The valve sits between the exhaust and intake sides of the engine, since its job is to move gas from one to the other. Look for a metal housing with an electrical connector, mounted in the path of a pipe running from the exhaust manifold toward the intake.
- Excavators — usually on the intake side, behind the turbocharger and near the EGR cooler pipe; hood and radiator guard often need to come off first
- Wheel loaders — under the engine cover, close to the intake manifold
- Agricultural tractors — commonly on the side of the block, with easier service access
- Skid steers and telehandlers — often buried in tight compartments; rear or side panels may need to come off
How to Verify the Diagnosis Before Ordering Parts?
A single fault code is not enough reason to order a valve. Codes identify an affected circuit or function — not always the failed component. A short diagnostic session before EGR valve replacement saves labor and prevents a second repair.
Ask your technician to confirm:
- All active, stored, and previously active fault codes have been pulled through the machine’s diagnostic port
- Freeze-frame data has been reviewed — engine speed, load, temperature, and boost when the fault triggered
- Wiring and connectors on the EGR circuit have been inspected for corrosion, oil, or damaged pins
- The intake port has been checked for heavy carbon buildup
- A bi-directional actuator test has been run, comparing the actual to the commanded valve position across the full range
- If any coolant loss is present, the EGR cooler has been pressure-tested and the charge-air side checked for boost leaks
Most non-road engines report faults using SPN/FMI codes under the SAE J1939 protocol. EGR-related codes generally fall into a few categories:
| Fault Category | What It Usually Points To | Check Before Replacing |
|---|---|---|
| Valve position feedback | Actuator not tracking command, position sensor drift | Wiring, connector, and actuator response under active test |
| Differential pressure | Passage restriction, sensor fault | Pressure sensor signal, passage carbon, cooler flow |
| Gas temperature | Cooler flow issue, sensor fault | Temperature sensor signal, coolant flow through the cooler |
| Control circuit | Power, ground, or driver circuit | Harness continuity, connector pin fit, ECM output |
| Cooler efficiency | Internal restriction or leak | Pressure test and coolant system check |
SPN numbers and thresholds vary by engine manufacturer. Cross-check the specific code against service literature before making a call.
Don’t buy the valve just because the code mentions EGR. A carboned-up valve is not automatically a failed one — most used diesel EGRs look filthy inside. Confirm the failure with live data first.
Clean or Replace? A Practical Decision
Cleaning has its place, but only under specific conditions.
Cleaning may be enough when:
- The actuator still tracks the commanded position within tolerance
- No electrical faults are present on the valve circuit
- The valve moves smoothly through its full range under active test
- Carbon restriction is moderate, and no coolant intrusion is present
Replacement is usually the right call when:
- The actuator motor is weak, slow, or unresponsive
- Position feedback is erratic or out of range
- The housing is cracked or shows signs of coolant intrusion
- The same fault returns shortly after cleaning and adaptation
- The valve is seized and will not move freely
If testing points to actuator, feedback, or housing failure, EGR valve replacement is usually more reliable than cleaning. When test results are inconclusive, more diagnosis is almost always cheaper than replacing parts on guesswork alone.
EGR Valve Replacement Procedure
Once testing points clearly to the valve, EGR valve replacement is straightforward on accessible engines and considerably more involved when the intake manifold, cooler, or cab floor has to come off. Labor time varies from a few hours on an open layout to a full day or more on a buried install.
Tools typically needed:
- Socket set with long extensions
- Torque wrench
- Coolant drain pan
- Gasket scraper
- Diagnostic tool for code clearing and adaptation
Core steps:
- Let the engine cool fully — exhaust and turbo components stay hot for a long time
- Isolate the batteries at the master disconnect, or disconnect both terminals on 12V and 24V systems
- Drain coolant if the valve has a coolant passage
- Unplug the electrical connector and any air or vacuum lines
- Remove the mounting bolts and lift the valve off
- Scrape the mating surface clean — all old gasket material must come off
- Fit a new gasket and set the replacement valve in place
- Torque the bolts in a cross pattern to the correct spec
- Reconnect wiring, air lines, and coolant hoses
- Refill and bleed the coolant system
- Clear codes and run any required adaptation or relearn
- Start the engine, watch live data, and check for leaks
Do not pry on an electronic valve by hand to check movement — the internal motor and gears can be damaged. While access is open, inspect the intake manifold gasket. Replacing it now is cheaper than pulling the intake twice.
Common time-adders on this job:
- Seized fasteners on hot-side hardware, especially on older machines
- Coolant hose fittings stuck to the cooler neck
- Stripped studs discovered only after removal starts
- Limited clearance around the turbo and heat shields
- Relearn procedures that have to be completed successfully before the code will clear
Labor estimates should reflect those risks, especially on high-hour machines and units that have worked in corrosive environments.
What If the Fault Comes Back After Replacement?
Fitting a new valve does not always clear the code. When the fault returns, the valve is often not the root cause. Check these before ordering another one:
- Wiring and connectors — corroded pins, chafed insulation, or poor connector fit
- Pressure and temperature sensors on the EGR circuit — a failed sensor can set a valve-related code
- EGR cooler — internal restriction or a small internal leak can trigger flow or efficiency faults
- Intake restriction and carbon buildup downstream of the valve
- Boost leaks in the charge pipes, clamps, or intercooler
- ECM calibration — check for applicable software updates
- Adaptation not completed — some platforms will re-flag a fault until the relearn procedure runs successfully
If the fault persists after all of the above are ruled out, go back to the freeze-frame data. The conditions that triggered the original code usually point to the real problem.
