

An EZGO gas cart that will not crank or charge usually needs a starter generator. This guide covers diagnosis, replacement selection, and installation. If your battery is new but the cart only whines or responds when tapped, the EZGO starter generator is the cause. No guesswork. Just clear steps to get your cart running again.
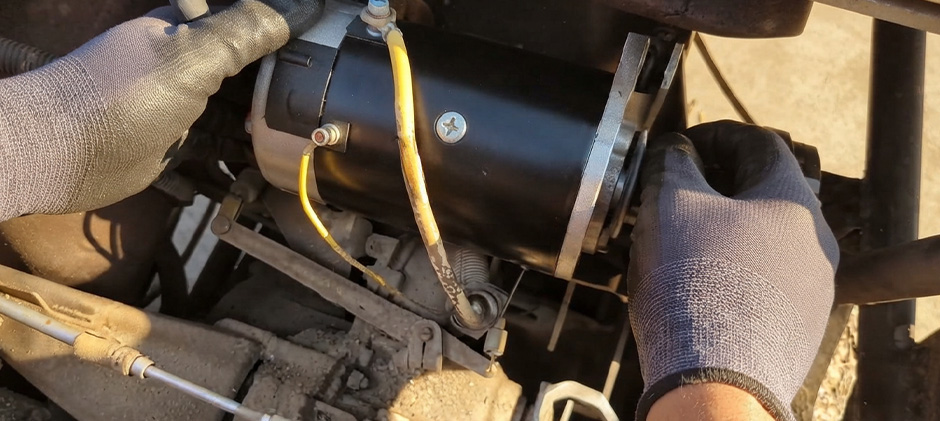
Diagnose The Problem Before Buying Parts
The EZGO starter generator has two jobs. It cranks the engine at start-up, then it charges the battery once the engine is running. That is why one failed unit can create two problems at once. The cart may not start. Or it may start and still leave the battery weak after a short drive.
That basic point matters first. Many owners replace the battery and stop there. The cart still fails, and time is lost. A proper check takes less effort than ordering the wrong part.
Common Signs Of Failure
These symptoms often point to a bad EZGO starter generator:
- The engine will not crank
- The engine cranks only once in a while
- A whining sound appears during startup
- Tapping the housing makes it try to engage
- The battery does not stay charged
- Lights grow dim during use
- Terminals get hot
- Belt squeals or slips
A weak battery can cause similar signs. So can a bad solenoid. A loose ground cable can do the same. Even so, if the cart has a fresh battery and the same no-start issue remains, an EZGO starter generator replacement becomes much more likely.
This is also a good time to inspect related service parts such as a starter solenoid, battery cable set, and voltage regulator. Those parts work in the same system, and one fault can hide another.
Quick Check Table
| Symptom | Likely Cause | First Check |
|---|---|---|
| No Crank | Starter Generator, Battery, Solenoid | Battery Voltage And Cable Tightness |
| Whining On Start | Worn Starter Generator, Slipping Belt | Belt Condition And Tension |
| Starts But Battery Dies | Charging Side Failure | Running Voltage And Regulator |
| Dim Lights | Low Charging Output | Ground, Terminals, Regulator |
| Intermittent Engagement | Internal Wear, Brush Wear | Wiring And Unit Condition |
Basic Checks That Save Time
Diagnosis should stay simple. Start here:
- Check battery voltage – Charge the battery fully before testing. A weak battery can confuse every other result.
- Inspect cable connections – Look for corrosion. Confirm the ground is clean and tight. Check both battery posts and engine-side connections.
- Listen during start-up – Silence may point to supply issues. A whine often points back to the starter side.
- Inspect the belt – Look for glazing, cracks, or frayed edges. A loose belt can stop the unit from doing its job.
- Test charging if the cart still runs – With the engine running at a steady speed, the voltage at the battery terminals should read between 13.5 and 14.5 volts. If it stays below 13 volts or does not rise above the resting battery voltage, the charging side is likely failing.
- Look for heat or wear – Burnt smell. Darkened terminals. Rough bearing noise. Visible damage near the posts.
If the cart only reacts when the starter generator is tapped, internal wear is likely. At that stage, a full replacement is often the more direct fix.
Match The Correct EZGO Starter Generator Replacement
Fitment comes before price. Many units look alike in photos, but the wrong one can waste a full afternoon.
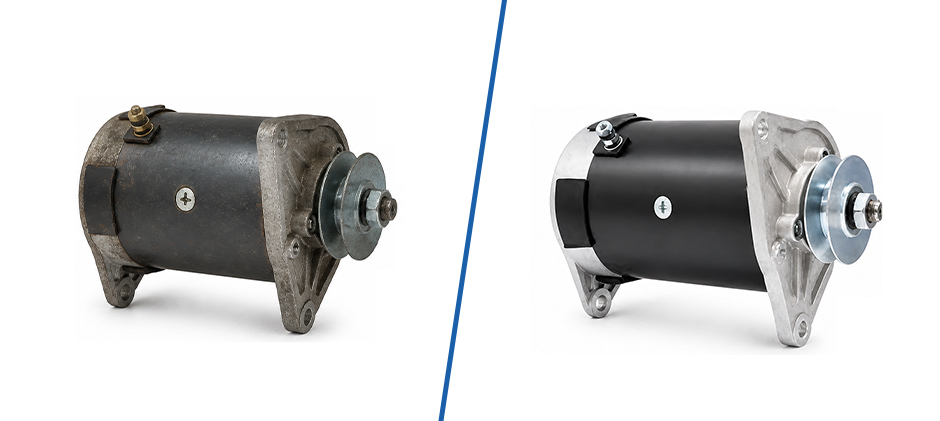
EZGO gas carts vary by:
- Model
- Year
- Engine type
- Pulley setup
- Wiring layout
- Part reference number
Older Marathon carts do not always use the same unit as newer TXT models. A 2-cycle cart will not follow the same fitment path as a 4-cycle cart. Kawasaki applications also differ from older engine setups. That is why appearance alone is not enough.
When comparing options for EZGO, always verify the cart details before ordering. Browsing broad aftermarket golf cart parts listings can help, but fitment still matters more than appearance.
Common Fitment Groups
The main fitment groups usually look like this:
| EZGO model group | Engine type | Typical year range | Notes |
|---|---|---|---|
| Marathon | 2-cycle | 1970s-1989 | Earlier 2-cycle models |
| Marathon | 4-cycle | 1989-1994 | Transition to 4-cycle |
| Medalist | 4-cycle | 1994-1995 | Short production run |
| TXT (pre-2009) | 4-cycle (Robin) | 1996-2008 | Most common replacement range |
| TXT (2009+) | 4-cycle (Kawasaki) | 2009-present | Different wiring and mounting |
Common Part References
Several product listings for gas EZGO and related models point to these part references: 660379/ 625715/ 617120/ 612028/ 649711
Older 2-cycle units may use different references. Always match the cart first, then the number. That approach makes replacement work much easier. It is also smart to review nearby wear items. A fresh starter generator belt, a brush set, or clean mounting hardware can help prevent another teardown later.
Full Unit Or Service Parts
A complete unit fixes more at once. Small service parts cost less, but they only help when the rest of the assembly is still in good shape.
A brush set may be enough if:
- The bearings are still quiet
- The housing is in good condition
- The terminals are not damaged
- The fault is clearly brush wear
A full replacement makes more sense if:
- The cart has repeated no-start issues
- The battery is not charging
- The unit makes a bearing noise
- Heat has damaged the posts or the wiring area
- The cart works in dusty, wet, or rough conditions
For farm carts, hunting carts, and utility vehicles, less downtime usually matters more than saving a small amount on a partial repair.
Remove And Install The Starter Generator Correctly
A careful install matters as much as the part itself. Many repeat failures come from wiring mistakes or belt tension errors, not from the unit.
Start with safety. Disconnect the battery first. This is the first step every time.
Typical tools include:
- 9/16 inch wrench or socket
- 1/2 inch wrench or socket
- 10 mm wrench or socket
- 8 mm wrench or socket
- Screwdriver for seat or access panel
- Phone camera or marker for wire labels
Removal Steps
Use this order to remove the old unit:
- Open the access area – Remove the rear panel or seat section if needed. Some carts need extra room if a rear seat kit is installed.
- Loosen the mounting hardware – Most units use two upper bolts and one lower adjustment bolt. Loosen first before removing everything.
- Release belt tension – Back off the lower adjustment point. Slide the belt off once it loosens.
- Inspect the belt – Replace it if it is cracked, glazed, stretched, or frayed. A new replacement drive belt can save trouble later.
- Disconnect the wires – Remove the wires carefully. Keep washers and nuts in order. Label each terminal if needed.
At this stage, the old unit should come free.
One Step You Must Not Miss
The jumper wire matters. For most EZGO 4-cycle gas carts, the starter generator has four terminals: F1, F2, A1, and A2. A common factory configuration uses a jumper wire from F1 to A2. The remaining terminals connect to the voltage regulator and ground. Before removing the old unit, take a photo of the wiring or label each wire. Match the new unit terminal by terminal, not by position alone.
Do not trust position by sight alone. Read the terminal marks on both units.
A missed or misplaced jumper can cause:
- No Crank
- No Charging
- False Troubleshooting Results
- Electrical Damage
This is where clean wiring and correct terminal hardware make a difference.
Installation Steps
Install the new unit in a steady order:
- Set the unit in place – Start the mounting bolts by hand. Leave them loose for alignment.
- Refit the belt – Make sure it sits fully in the pulley grooves.
- Install the lower adjustment bolt
- Reconnect the wires – Put each lead back on the correct terminal. Tighten snugly, not excessively.
- Set belt tension – The belt should feel firm. It should not flap or squeal. It should not be forced too tightly.
- Tighten the mounting bolts – Secure the unit after the belt and alignment are correct.
That process is simple, but the small details matter. A belt that is too loose will slip. A belt that is too tight can shorten bearing life.
Test The Repair And Avoid Repeat Problems
Testing before closing the panel saves time. Do not put everything back together until the unit proves it can start and charge correctly.
Use this quick test order:
- Reconnect the battery
- Try a normal start
- Listen for clean engagement
- Check for belt squeal
- Confirm lights stay stable
- Test charging voltage if possible
- Feel for hot terminals after a short run
If the cart now starts cleanly and the battery begins charging again, the EZGO starter generator replacement likely fixed the issue. This is also the best time to inspect nearby voltage regulator parts, battery cables, and engine electrical parts while access is still open.
Common Mistakes To Avoid
Most repeat repairs come from a short list of mistakes:
Wiring mistakes
- Mixing up cable positions
- Forgetting the jumper wire
- Failing to photograph the original setup
Belt mistakes
- Reusing a badly worn belt
- Leaving the belt too loose
- Tightening the belt too much
Ordering mistakes
- Buying by photo only
- Not confirming engine type
- Confusing 2-cycle and 4-cycle fitment
- Missing Kawasaki versus older engine setups
Testing mistakes
- Replacing the unit without checking the grounds
- Skipping the charging test after installation
- Blaming the new unit when the regulator is at fault
If the new starter generator is installed and the symptoms stay the same, go back through the system step by step. Check the battery, solenoid, ground path, regulator, and wire routing again.
Practical Buying Advice For Work Carts
Work carts see harder use than many casual golf carts. Dust, moisture, vibration, long idle periods, and added electrical loads all affect service life.
That makes part selection more important. Focus on:
- Verified fitment
- Clear part number references
- Correct terminal layout
- Support for EZGO gas applications
- Access to matching service parts
For many owners, it makes sense to order a few related items together:
- Replacement drive belt
- Brush set
- Mounting hardware
- Battery cable ends
- Charging system parts
That small step can reduce downtime and cut the chance of doing the same repair twice.
Final Words
A failed EZGO starter generator can look like a battery, belt, or wiring issue. Careful checks, correct fitment, and a clean install solve most problems. If a new EZGO starter generator replacement is needed, FridayParts is one option to consider for aftermarket parts, with affordable pricing, a wide inventory, and broad compatibility across many heavy equipment brands.
