

Here’s how to winterize an outboard motor: seven steps before storage. Stabilize the fuel, flush the cooling system, fog the engine, change the engine oil on 4-strokes, replace lower unit gear oil, grease key points, and disconnect the battery. Miss one of these, and spring startup can turn into hard starting, corrosion, or lower unit trouble. Below, you’ll get the exact order, what changes for 2-stroke and 4-stroke models, and the checks that save the most money later.
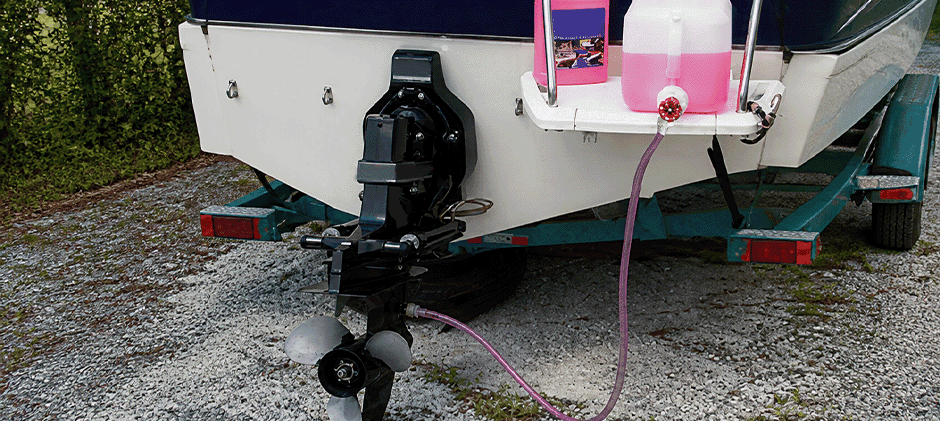
What To Do Before Storage?
Setting up properly saves time and reduces skipped steps. Before starting, park the trailer level, keep the motor upright, and collect your supplies.
Basic Supplies
| Item | Why You Need It |
|---|---|
| Fuel stabilizer | Helps prevent stale fuel and deposits |
| Flushing muffs or hose port | Lets you flush the cooling system |
| Marine antifreeze | Adds freeze protection in cold climates |
| Fogging oil | Coats internal metal surfaces during storage |
| Lower unit gear lube | Replaces old gear oil before winter |
| Gear lube pump | Fills the lower unit from the bottom |
| Marine grease | Protects moving points and fittings |
| Engine oil and filter | Needed for 4-stroke service |
| New drain screw gaskets | Helps seal lower unit drain and vent screws |
| Battery terminal cleaner | Helps protect battery connections |
If you are replacing worn service items at the same time, fuel system parts, cooling system parts, and electrical parts are worth checking before the boat sits for months.
Quick Pre-Check
Before full winterizing, inspect for problems that should not wait until spring:
- Weak tell-tale water flow
- Milky lower unit oil
- Damaged propeller blades
- Fishing line around the prop shaft
- Cracked fuel lines
- Corroded battery terminals
- Worn spark plugs
If any of these show up now, fix them before storage. Winter does not improve mechanical problems.
Step-by-Step Winterizing
Working in a set sequence is safest. Treated fuel circulates before fogging, and gear oil gets changed before the cold arrives.
1. Stabilize The Fuel
Mix the correct amount of fuel stabilizer into the tank, then run the engine for 10 to 15 minutes. This pushes treated fuel through the lines, pump, injectors, or carburetors.
Helpful tips:
- Fresh fuel is better than old fuel going into storage
- A nearly full tank can reduce moisture buildup
- Use the product ratio listed on the bottle
- Do not skip circulation time
This step matters because untreated fuel can form gum and varnish during storage. If you are already servicing the fuel side, fuel filters and fuel water separator parts are smart items to inspect.
2. Flush The Cooling System
Flush the motor with fresh water to clear out salt, sand, and silt. If there’s a built-in hose port, use it with the engine off when the manufacturer calls for it. With flushing muffs, make sure they cover the water intakes completely and that water flows steadily.
During flushing:
- Watch the tell-tale stream
- Check that the water is not excessively hot
- Flush long enough to clear residue
- Let the motor drain fully after shutdown
In freezing climates, many people also run marine antifreeze through the cooling passages after flushing. This adds protection if a small amount of water remains trapped inside.
3. Fog The Engine
Fogging protects internal engine surfaces during long storage. This is one of the most important parts of how to winterize an outboard motor if the boat will sit through a full off-season.
For carbureted engines, spray fogging oil into the intake while the engine is running. Sputtering and white smoke are normal.
For fuel-injected models, use the fogging method designed for that system. Don’t assume the same approach works across all engines.
Fogging is often followed by pulling and checking the spark plugs. If they’re worn or fouled, install new ones before storage or before launching in spring.
2 Stroke And 4 Stroke Differences
Not every outboard needs the same service list. This is where many winterizing mistakes happen.
2 Stroke Checklist
For how to winterize a 2-stroke outboard motor, focus on these items:
- Stabilize and circulate fuel
- Flush the cooling system
- Fog the engine
- Replace lower unit gear oil
- Grease fittings and moving points
- Fill the oil tank if oil-injected
- Disconnect and maintain the battery
A 2-stroke does not need crankcase engine oil service like a 4-stroke, but it still needs strong corrosion protection before storage.
4 Stroke Checklist
For how to winterize a 4-stroke outboard motor 4 stroke, add engine oil service to the standard process:
- Warm the engine
- Drain old engine oil
- Replace the oil filter
- Refill with the correct marine oil
- Run briefly and recheck the level
Used engine oil can hold moisture and combustion byproducts. Leaving that oil in place all winter is not a good idea. While servicing this area, inspect engine maintenance parts and filtration parts for anything due next season.
Change Lower Unit Oil The Right Way
This step deserves special attention because lower unit damage is expensive.
Place a drain pan under the gearcase. Remove the lower drain screw first, then the upper vent screw. Let the oil drain completely and inspect its condition.
What To Look For
| Gear Oil Condition | What It Can Mean |
|---|---|
| Clean and dark | Normal used oil |
| Milky or creamy | Water intrusion |
| Metal fuzz on magnet | Normal wear in small amount |
| Large metal chips | Internal wear problem |
Milky oil means water has gotten into the lower unit. Don’t ignore it. Freezing temperatures will make it worse, and internal parts could already be damaged.
When refilling:
- Pump new gear lube from the bottom hole
- Continue until oil appears at the top vent hole
- Install the top screw first
- Then remove the pump and quickly install the bottom screw
- Use fresh gaskets on both screws
If you need service parts during this step, gearcase seals, drain screw gaskets, and marine lubricants are useful items to have ready.
Final Checks Before Winter
Once the main service is done, finish the details that protect the motor during long storage.
Protect Moving And Exposed Parts
Apply marine grease to steering, tilt, and pivot points. Spray corrosion protection on exposed metal areas under the cowling and around the engine exterior. If possible, remove the propeller, inspect the shaft, clear any fishing line, and grease the splines lightly before reinstalling.
Battery And Storage Position
Use this short checklist:
- Disconnect the battery
- Clean the terminals
- Charge the battery fully
- Store it in a cool, dry place if needed
- Keep the outboard in a vertical position
That upright storage position matters. It helps leftover water drain out and reduces the chance of freeze damage.
Common Mistakes To Avoid
A lot of spring problems come from small misses in fall:
- Running on muffs without enough water flow
- Forgetting to circulate stabilized fuel
- Using the wrong fogging method on EFI models
- Leaving old gear oil in the lower unit
- Ignoring milky oil
- Storing the motor tilted up for months
- Skipping grease and corrosion protection
It’s also a smart time to inspect the propeller hardware, battery cables, and steering components. That way, you’re not hunting for parts when the season rolls back around.
How to De-Winterize an Outboard Motor?
Spring prep is much easier if winterizing was done well. For how to de-winterize an outboard motor, keep it simple and systematic.
Spring Start Checklist
- Reinstall or reconnect the battery
- Inspect fuel lines and primer bulb
- Check engine oil on 4-strokes
- Check lower unit for leaks
- Inspect spark plugs
- Reinstall the prop if removed
- Confirm cooling water flow on startup
- Test idle quality and shifting
If the engine starts hard, idles rough, or shows weak tell-tale flow, stop and inspect before heading to the ramp.
Final Words
Spending a few minutes on storage prep pays off. With the fuel system, lower unit, battery, and internal engine surfaces all protected, your outboard is in a much stronger position for next season. If you are picking up maintenance items or replacement components, FridayParts offers aftermarket parts that are affordable, widely compatible, and easy to source from one place.
