

How to remove a stubborn hydraulic cylinder gland? Hold the cylinder body tight. Fit a spanner wrench into the holes on the gland, then add a steel cheater pipe for extra leverage. Sounds easy enough, but heavy rust, damaged threads, or stripped holes make things way trickier. Keep reading for the full step‑by‑step method to loosen this cap safely.
Why Is the Hydraulic Cylinder Gland Stuck?
When you work on a hydraulic cylinder, that end‑cap gland is usually your first big headache. The hydraulic cylinder gland (also called a gland nut or end cap) keeps hydraulic fluid sealed inside the tube while letting the piston rod slide back and forth. Over time, it deals with huge internal pressure, weather exposure, and non‑stop mechanical stress.
- Thread Galling. Galling takes place when the metal threads on the gland and cylinder tube rub hard against each other. Tiny spots of the metal actually fuse together. Throw in years of dirt, moisture and rust, and the threads lock solid. Rust builds up inside those tiny gaps between threads and acts just like thread‑lock glue.
- Physical Deformation. If the cylinder gets a hard knock out in the field, the tube near the threads can get slightly squashed out of round. That clamps down tight on the gland. A lot of mechanics start with a hammer and punch to knock the cap loose. This might work for a lightly tightened gland, but smacking those pin holes with a punch often bends the holes up. Then you can’t even use your correct spanner wrench later on. Hammer blows almost never deliver enough force to break rust loose on heavy‑duty cylinders. What you really need is steady turning torque. That’s why the right tools matter so much.
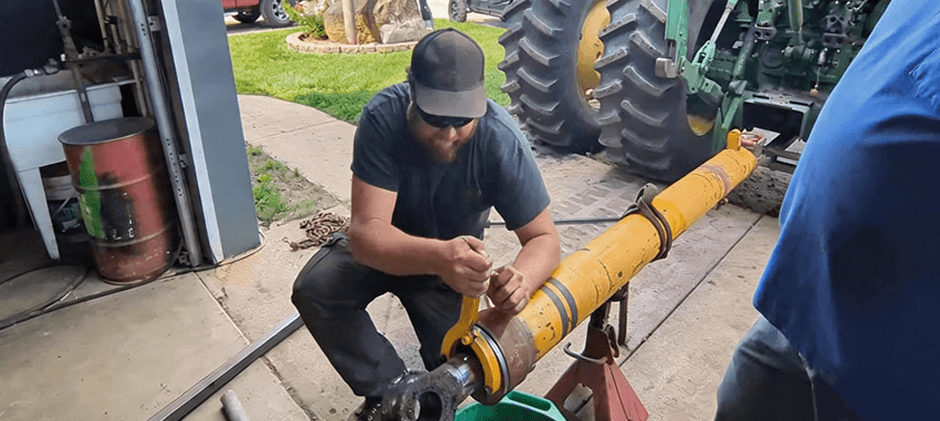
Tools and Preparation
Before applying any force, we must prepare the work area and gather the correct tools. Trying to muscle a stuck component without preparation usually results in broken tools and injured knuckles.
- An adjustable spanner wrench. Do not rely on cheap, thin metal wrenches, as the jaws will simply twist and bend under the heavy torque required for this job. The wrench must have stout pins that fit exactly into the holes on the face of the gland. Sometimes, the pins on an American-sized spanner wrench might be slightly too large for metric gland holes. If this happens, you can carefully grind the pins down just a hair so they seat deeply and securely into the holes.
- Secure the cylinder casing. If the cylinder rolls around on your workbench, you cannot apply torque. A highly effective trick is to use the tractor hitch mount. By sliding the base eye of the cylinder into the heavy equipment’s hitch and tightening the mounting bolts, you lock the cylinder casing completely in place. It will not roll, allowing you to put all your energy into turning the wrench.
- Need penetrating oil, a heavy steel square tube or pipe to act as a cheater bar, and potentially an oxy-acetylene torch. If you want to see exactly how we set up this leverage system, you can [check out our operation video here] to watch the process in action.
- Drain the hydraulic fluid from the cylinder before starting. Loosening a gland with fluid still trapped inside can create a messy workspace and fight against your turning efforts due to internal vacuum or pressure.
How to Remove the End Gland with a Spanner Wrench?
Initial Preparation and Penetrating Oil
Get your cylinder locked down tight and drain out all the fluid first, then you’re ready to start taking it apart. Pour on plenty of penetrating oil over the threads. Let it sit at least 15 minutes so the oil can seep down into those rusty threads.
Proper Wrench Placement and Leverage
Grab your spanner wrench and push the pins all the way into the holes on the cylinder gland. The wrench needs to lie flat right up against the face of the cap. If the wrench tilts at an angle, the pins will pop out under load and ruin the holes. After the wrench is seated correctly, slide a steel cheater pipe over the wrench handle. A longer pipe gives you more turning power.
Applying Force and Shockwaves
Push steadily on the cheater pipe. Don’t jerk it hard. If the gland still won’t move, tap the end of the cheater pipe with a heavy hammer. Those hammer‑hit shockwaves plus your turning torque will often crack the rust loose. You’ll hear a clear pop once the threads finally break free. For a complete visual guide on applying this technique safely, check out our hydraulic cylinder operation video.
Applying Heat for Thermal Expansion
If you put good force on it and the gland is still stuck, stop before you snap your wrench. Time to use heat. Grab your oxy‑acetylene torch and heat the outside of the cylinder barrel exactly where the internal threads are. Heat it evenly all the way around. Your aim is to expand the outer tube a little without heating the inner gland too much. As soon as the steel gets hot, try your spanner wrench again. Thermal expansion usually breaks even the tightest rusted threads loose.
Alternative Methods for Damaged Glands
If things are already bad and the pin holes got wrecked from earlier hammer‑and‑punch tries, you’ll need a different plan. Weld a thick‑wall steel nut right onto the front of the gland. Let the weld cool off, then use a big socket wrench to spin that nut loose. The heat from welding also helps break the seized threads. Once you get the cap off, you can cut the welded nut back off or just replace the whole gland.
Inspect the Cylinder and Replace the Seals
Once you spin the hydraulic cylinder gland all the way off, slide it gently down the piston rod. Pull the whole piston‑rod assembly out from the cylinder tube. Now go through and check every single part, so everything works right when you put it back together.
- Take a good look over the chrome rod. Run your fingers along its full length to feel for deep scratches, pitting or dents. Any rough spots on the rod will rip your brand‑new seals right away. You’ll get leaks as soon as you fire up hydraulic pressure. If the rod has bad scoring, you either need to re‑chrome it or swap in a new one. Next, shine a light inside the cylinder tube. The inner walls need to be smooth, no deep gouges.
- Inspect the piston head and the inside of the gland. You’ve got a few different seals here: the wiper seal that keeps dirt out, the U‑cup seal holding back high‑pressure oil, plus O‑rings and backup rings. Pop out all the old seals with a soft brass pick so you don’t scratch the metal grooves.
- Now fit the new seals. Make sure your new seals match the old ones exactly. Pay extra attention to which way the seal lips point. The open side on a U‑cup seal always faces toward the pressurized oil. Coat all new seals and O‑rings with clean hydraulic fluid before you push them down into their grooves.
- Slowly slide the rod back inside the tube. Watch out so the piston seals don’t get pinched on the cylinder threads. Fit the gland back on and screw it on by hand first to avoid cross-threading. Finish tightening the cap with your spanner wrench. Get it snug to the right specs.
Conclusion
A stubborn hydraulic cylinder gland can take more than a hammer and punch to remove. The right spanner wrench, a solid setup, and enough leverage can make the job much easier. If your cylinder needs new hydraulic seals or replacement parts, FridayParts offers a wide range of aftermarket hydraulic cylinder parts. With a wide selection and competitive prices, browse now!
