

A transmission fluid leak on off-road machinery is a “small problem” that can turn into a no-move breakdown fast. In this article, we’ll help you find the leak source, understand the most common causes of heavy equipment, and choose fixes that actually hold up in dusty, high-heat, high-vibration work—so you can reduce downtime and avoid internal transmission damage.
How To Diagnose a Transmission Fluid Leak?
Diagnosis is easiest when you stop guessing and follow a short routine:
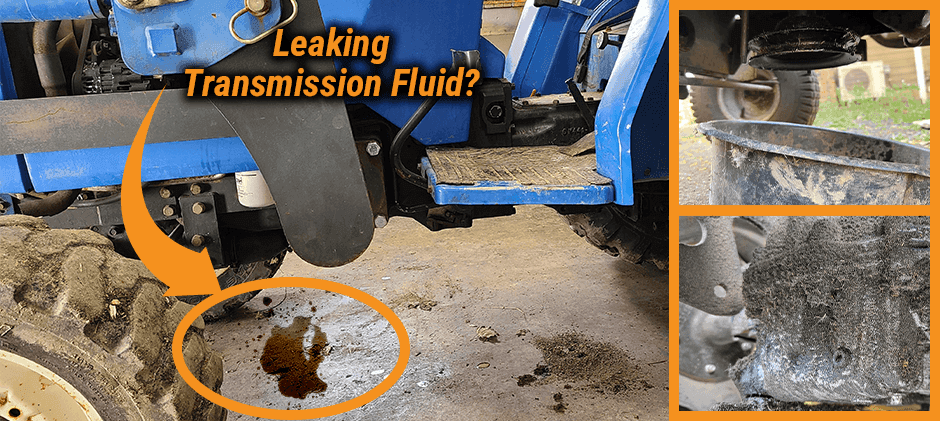
- Confirm the fluid type: transmission fluid is usually red to dark brown, slippery, and can smell burnt if overheated. (Color alone is not 100% reliable.)
- Clean first, then inspect: wash off old grime around the transmission case, lines, fittings, and output areas.
- Locate the first wet spot: leaks spread backward with airflow and collect on guards/belly pans.
- Check cold vs. hot: some leaks only show under heat and pressure.
- Verify the vent/breather: a blocked vent can push fluid past seals and create “mystery leaks.”
Signs of a Transmission Fluid Leak
Typical signs on off-road equipment include:
- Fresh red or dark brown drops under the center/drivetrain area
- Wet, sticky dirt buildup on the transmission housing
- Slipping under load (RPM rises, but travel power doesn’t)
- Rough or slow shifts / delayed engagement
- Whining, grinding, or humming noises that were not there before
- Burning smell or higher-than-normal transmission temperature
Keep this in mind: a puddle is not the only clue. The “big clue” is often how the machine drives or pushes when the fluid level is low.
Common Causes of Transmission Fluid Leaks
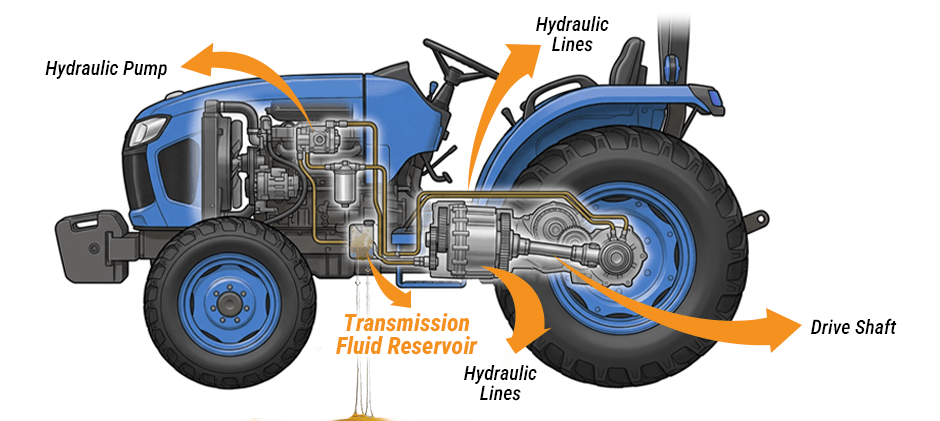
Off-road machinery transmissions don’t just move power—they also rely on fluid to lubricate, cool, and (in many systems) support hydraulic control for shifting. When the fluid level drops, damage tends to snowball: heat rises, friction increases, and wear spreads to clutches, bearings, gears, and control components.
Below are the most common causes of a transmission fluid leak on heavy equipment, plus what to look for and why it matters.
1) Worn shaft seals
Why it happens: seals harden with heat cycles, wear from dust, or get damaged by shaft play. Vibration and misalignment accelerate it.
What you’ll see:
- A wet ring around an output yoke or PTO area
- Oil thrown outward in a circular pattern (rotating leak)
- Drips that increase after travel or higher RPM
What it can damage: low fluid leads to bearing and gear wear, plus overheating—especially on long travel or constant-load jobs.
Extra clue: if the shaft has noticeable play, replacing only the seal may not last. The seal lip cannot control oil if the shaft wobbles.
2) Gasket or case seam leaks
Why it happens: gasket compression relaxes over time; bolts loosen from vibration; mating surfaces get nicked during past service; covers warp from overtightening.
What you’ll see:
- A “wet line” along a seam or cover edge
- Slow seep that turns into a drip after a hot shift cycle
What it can damage: these leaks are often “slow,” but slow leaks still cause low fluid pressure and hotter operation—two conditions that shorten clutch life.
Field note: Overtightening is a common self-inflicted cause. Crushed gaskets and warped covers leak again.
3) Cooler lines, hoses, and fittings
Many off-road transmissions use cooler circuits to control temperature. That means more external leak points.
Why does it happen:
- Rubber hoses age and crack
- Steel lines rub through on clamps or frames
- Fittings loosen after repeated heat cycles
- Dirt buildup hides a pinhole until it becomes a stream
What you’ll see:
- Wetness along a line run
- Drips appear more when the machine is hot
- Misty oil film near a fitting under pressure
What it can damage: rapid fluid loss + overheating. This is one of the quickest paths from “minor leak” to “machine won’t move.”
4) Vent/breather restriction
A transmission case needs to breathe. Off-road dust and mud can clog a breather.
Why it happens: dust, mud, paint, or debris blocks the vent; some machines see pressure spikes under heavy load and heat.
What you’ll see:
- Seepage from multiple seals at once
- Oil mist around the vent area
- Leak appears mainly after long runs, steep work, or hot weather
What it can damage: pressure forces fluid past seals, then low fluid creates heat, which hardens seals further. It becomes a cycle.
5) Impact damage
Off-road equipment meets rocks, scrap, stumps, and uneven ground.
Why it happens: a hit causes a hairline crack or distorts a cover sealing surface.
What you’ll see:
- A leak that starts suddenly after a “normal day.”
- A wet spot that returns even after cleaning and retorquing
What it can damage: if the crack grows, the leak can go from seep to steady loss—then internal wear follows.
6) Internal wear that triggers external leaks
Sometimes the leak is not the root problem. Internal wear can create:
- Excessive shaft movement (kills seals quickly)
- Higher temps (hardens seals, thins fluid)
- Poor hydraulic control (harsh shifts, slipping)
On many heavy machines with automatic-style drivetrains, the front area around the torque converter can be involved. When related seals or mating surfaces start leaking, fluid loss often shows up near the front/bellhousing area and may get worse with RPM and heat.
What it can damage: clutches, bearings, gear sets, and (in controlled transmissions) valves/solenoids that depend on stable fluid pressure.
How to Fix a Transmission Fluid Leak Quickly?
“Quickly” should mean fast triage + correct repair plan, not dumping fluid in every morning and hoping for the best. Once the leak is confirmed, decide which lane you’re in:
- Lane A: External fix (often same-day)
- Lane B: Seal replacement with downtime
- Lane C: Internal issue (plan parts + labor)
Step 1: Protect the transmission
- Stop heavy work if slipping or delayed engagement starts.
- Top up only the correct fluid to the correct level (overfill can make leaks worse).
- Keep dirt out of fill ports—clean before opening.
Step 2: Fix the common external sources first
These are the repairs that often solve the problem without opening the transmission:
- Retorque cover bolts to spec (don’t overdo it)
- Replace a damaged O-ring or crush washer on drain/fill plugs
- Repair/replace cooler lines and hoses, and re-route to prevent rubbing
- Clean or replace the breather/vent if restricted
- Replace leaking clamps and fittings (especially on return lines)
Step 3: Replace seals/gaskets the right way
If the leak is from a seal or gasket, the “quick fix” is rarely a chemical additive. A real fix usually includes:
- Confirming the sealing surface is not scratched or warped
- Checking shaft condition and alignment (a grooved shaft or wobble defeats new seals)
- Replacing related wear items if access is the expensive part of the job
For equipment service items that support proper sealing—seal kits, O-rings, oil seals, gaskets, clamps, breathers, and more—browse seals.
Step 4: If symptoms suggest internal trouble, plan the repair
If the leak comes with slipping, rough shifts, strange noises, or repeated overheating, the transmission may already be suffering. At that point, focus on preventing repeat downtime:
- Inspect for metal debris during service
- Verify fluid pressure and shift behavior (if applicable)
- Replace the failed component(s) instead of only resealing around them
If you’re sourcing drivetrain components for heavy equipment repairs—clutches, gears/gearboxes, shafts, axles, bearings, valve bodies, solenoids, and related items—check transmission parts: to match by machine model or part number.
Prevent Transmission Fluid Leaks and Maintenance Tips
Prevention matters more for off-road machinery because dust, vibration, and heat are constant. The goal is not “perfect”—it’s catching problems early enough that the fix stays small.
- Do a fast walk-around: look for fresh wet dirt, not old stains.
- Watch shift feel and response: new hesitation can be a low-fluid warning.
- Keep cooling systems clean: heat hardens seals and thins fluid.
- Inspect hose routing and clamps after any service—rubbing is a slow killer.
- Service filters on schedule to reduce debris circulation and heat.
- Check vents/breathers regularly, especially in dusty or muddy work.
Simple “leak prevention” checklist
- Clean around the transmission case and line runs
- Check vent/breather condition
- Look for damp seams and rotating sling patterns
- Verify fluid level (correct procedure for your machine)
- Address small leaks immediately—before heavy season
Conclusion
A transmission fluid leak on off-road machinery is a reliability problem first and a repair problem second. Quick diagnosis starts with cleaning and finding the first wet point, then checking vents, lines, and sealing surfaces. If the leak points to worn seals, aging hoses, or drivetrain wear, replacing the right components is usually cheaper than repeated top-offs and lost hours. FridayParts supports heavy equipment owners as an aftermarket parts supplier with high-quality products at affordable prices, a vast inventory, and wide compatibility across many equipment brands—so the repair can be planned and completed with fewer delays.
